If you’ve ever seen a striking deep-blue print with a ghostly white silhouette of a leaf or a flower, you’ve probably seen cyanotype printing in action. It’s one of the oldest photographic printing processes around, dating back to the 1840s, and it’s having a major comeback among crafters, artists, and hobbyists who love the magic of seeing an image appear right before their eyes using nothing more than sunlight.
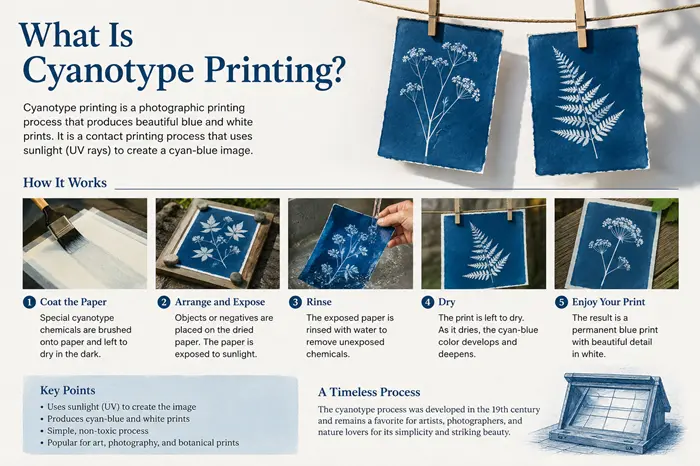
So, what is cyanotype printing exactly? At its core, it’s a camera-less photographic process that uses light-sensitive chemicals to create images in a distinctive Prussian blue color. When paper or fabric coated with this solution is exposed to UV light and then rinsed with water, the exposed areas turn a rich cyan-blue while the covered areas stay white. The result is a one-of-a-kind print that feels both scientific and artistic.
The best part? You don’t need a darkroom, a camera, or any fancy equipment to get started. With a basic cyanotype printing kit, some objects from around your home, and a sunny day, you can create your very own sun prints in under an hour.
The Cyanotype Printing Process, Step by Step
Understanding the cyanotype printing process helps demystify why these prints look the way they do. Here’s how it generally works.
First, a light-sensitive solution made from two iron compounds, ferric ammonium citrate and potassium ferricyanide, is mixed and applied to a surface like paper or fabric. This has to be done in a dimly lit room since the solution reacts to UV light.
Once the coated material dries, it’s ready for exposure. This is where the creativity comes in. You place objects, negatives, or stencils on top of the coated surface, then expose it to a UV light source.
After exposure, the print is rinsed thoroughly in water. This washes away the unexposed chemicals and reveals the image. As it dries, the blue color continues to deepen and oxidize, becoming more vibrant over the following minutes and hours.
Cyanotype Sun Printing: Harnessing Natural UV Light
One of the most appealing things about this craft is that you don’t need any special equipment to expose your prints. Cyanotype sun printing relies entirely on natural sunlight as the UV light for cyanotype printing, making it an accessible and eco-friendly hobby.
On a bright, sunny day, exposure can take as little as 5 to 15 minutes. On overcast days, it might take 30 minutes to an hour or longer. The intensity of the sun, the time of day, and even the season all affect how quickly your print develops, which is part of the fun. No two prints are ever exactly the same.
For those who want more consistent results regardless of weather, UV lamps or LED UV light panels designed for printmaking are a popular alternative. These give you control over exposure time and let you create prints any time of year, rain or shine.
Choosing the Best Paper for Cyanotype Printing
Your choice of material has a huge impact on how your final print looks and feels, so it’s worth understanding what makes the best paper for cyanotype printing.
Watercolor paper is a favorite among beginners and experienced printers alike because of its thickness and texture. A heavier weight, around 140lb or higher, holds up well to the wet chemical application and rinsing process without warping or tearing. The slightly textured surface also gives prints a lovely, tactile quality.
Beyond watercolor paper, many hobbyists experiment with mixed media paper, printmaking paper, and even handmade or recycled papers for unique effects. The key is choosing something absorbent enough to hold the chemical solution but sturdy enough to survive a water rinse.
If you’re using a pre-made cyanotype printing kit, the included cyanotype printing paper is usually pre-coated and ready to expose right out of the package, which is a great way to practice the process before mixing your own chemicals.
Cyanotype Printing on Clothes: Wearable Art
Cyanotype isn’t limited to paper. Cyanotype printing on clothes has become a popular way to create custom, wearable designs on t-shirts, tote bags, pillowcases, and other natural fiber fabrics.
Cotton, linen, and other natural fibers work best because they absorb the cyanotype solution evenly. Synthetic fabrics tend to resist the chemicals and produce weaker, patchier results. Before coating, fabric should be washed to remove any sizing or finishes that could interfere with absorption.
The process is largely the same as paper printing: coat the fabric, let it dry in a dark space, arrange your objects or stencils, expose to sunlight, and rinse. The result is a durable, washable design with that signature deep blue tone, perfect for creating one-of-a-kind clothing pieces.
Photography and Cyanotype Printing
While cyanotype is often associated with simple sun prints of leaves and flowers, photography cyanotype printing opens up a whole different creative avenue. By creating a digital negative, either by inverting a photo and printing it onto transparency film, you can transfer photographic images onto cyanotype-coated paper or fabric.
This technique bridges traditional photography with handmade printmaking, giving photographers a way to produce tactile, archival-quality prints with a vintage aesthetic. It’s a favorite among art students and photographers looking to slow down and engage with their images in a more physical way.
Cyanotype Printing Ideas to Get You Started
If you’re searching for cyanotype printing ideas, the possibilities are nearly endless. Pressed flowers, ferns, and leaves are classic choices that create elegant, botanical-style prints. Lace, feathers, keys, and other flat household objects can produce surprising and beautiful silhouettes.
For something more personal, try arranging objects that tell a story, like seashells from a beach trip or dried herbs from your garden. You can also experiment with layering translucent objects, like onion skins or thin fabric, to create soft, ghost-like shadows within your print.
Once you’re comfortable with the basics, try combining cyanotype with other art techniques like hand-painting, embroidery, or collage for mixed-media pieces that are truly your own.
How to Do Cyanotype Printing at Home
Ready to try it yourself? Here’s a simple overview of how to do cyanotype printing for your first project.
Start with a cyanotype printing kit if you’re a beginner. These kits typically include pre-mixed or easy-to-mix chemicals, instructions, and sometimes pre-coated paper, taking the guesswork out of your first attempts.
Work in a dimly lit room when coating your paper or fabric, since the solution begins reacting as soon as it’s exposed to bright light. Once coated, let the material dry completely in a dark or low-light space.
Arrange your chosen objects on the coated surface, then place it in direct sunlight or under a UV light source. Check periodically; the coating will shift from yellow-green to a grayish-blue as it exposes.
Finally, rinse the print thoroughly in cool water until the water runs clear, then let it dry. Watch as the blue continues to deepen over the next hour, revealing your finished piece.
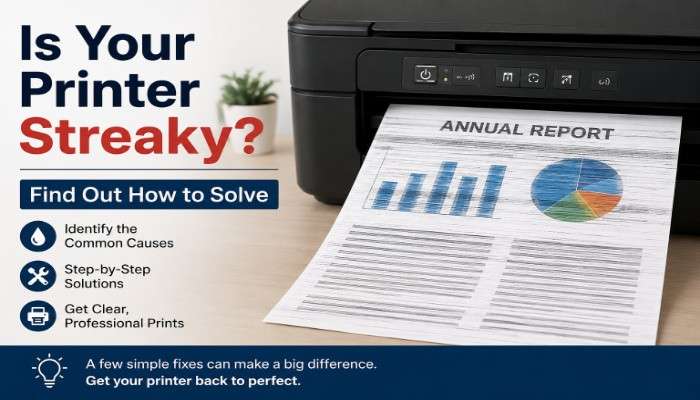
Is Your Print Streaky? Here’s How to Fix It
Streaky or uneven prints are one of the most common issues beginners run into, but the good news is they’re usually easy to fix. Streaks often happen when the cyanotype solution is applied unevenly with a brush, so using a foam brush or sponge in smooth, overlapping strokes can help create a more consistent coating. Uneven drying is another culprit. If one part of your paper or fabric dries faster than another, it can absorb light differently during exposure. Drying your coated material flat in a consistent, dark environment helps avoid this. Hard water can also leave mineral streaks during rinsing, so using filtered or distilled water for both mixing and rinsing often produces cleaner, more even results. If streaks persist, try applying a thinner, more even layer of solution and giving it a longer, undisturbed drying time before exposure.
Final Thoughts
Cyanotype printing is an accessible, rewarding craft that combines art, science, and a bit of sunshine. Whether you’re making botanical prints on paper, designing custom cyanotype printing on clothes, or exploring photography cyanotype printing with digital negatives, this centuries-old technique offers endless room for creativity. All you need is a little curiosity, the right materials, and a sunny window to get started.